

Introduction
Installing a chimney cover is an important step in keeping your chimney safe, working well, and lasting a long time. A chimney without a properly built cap is in danger of several things, such as rainwater getting in, rubbish building up, and animals getting in. Choosing the right sort of cap, getting the chimney ready, and making sure it is properly secured are all steps in the process of chimney cap installation. Many homeowners forget to take care of their chimneys, but putting a chimney cover on can make your chimney last a lot longer, improve the air quality inside your home, and lower the risk of fire. Every homeowner who wants to make sure their heating system works safely and efficiently needs to know why and how to install a chimney cover.
Why It’s Important to Install a Chimney Cap
Installing a chimney cover has many benefits that make it safer and more efficient. A chimney cap’s main job is to keep rain and snow out of the chimney flue. Water may do a lot of damage to the chimney’s brick and metal parts, causing fractures, rust, and expensive repairs. Also, putting a chimney cap on keeps creatures like birds, squirrels, and raccoons out of the chimney. These animals often look for a place to stay within unprotected chimneys. These incursions can obstruct the passage of air, which can cause smoke and gas to build up inside the house. Another important part of putting on a chimney cap is making sure that sparks and embers don’t escape the chimney and start fires in neighboring buildings or debris. This is especially critical in places where wildfires are common or when homes have wooden roofs or dry areas. When you install your chimney correctly, it works safely and lowers the chance of accidents and damage.
Different Kinds of Chimney Caps and what they Do

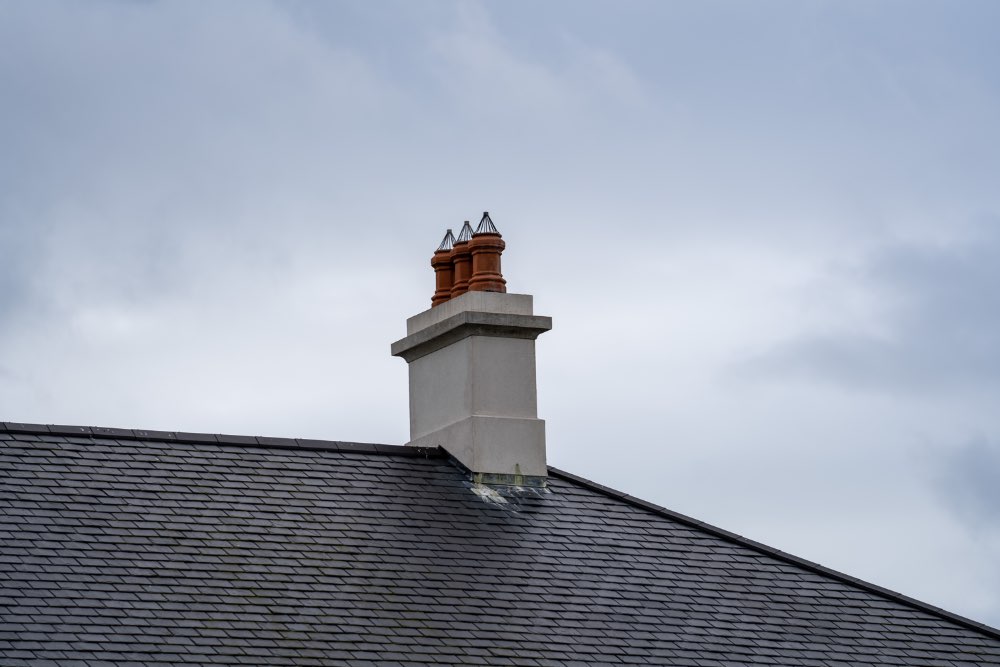
There are many different kinds of chimney caps, and each one has a different purpose when it comes to chimney cap installation. Stainless steel caps, copper caps, and galvanized steel caps are the most frequent varieties. Stainless steel caps are a common choice for chimney caps since they are very strong, don’t rust, and work well in most climates. Copper caps are more expensive, but they last a long time and look good, which can make the outside of a property look better. Galvanized steel caps are a cheap choice that provide basic protection, but they may not last as long as copper or stainless steel. You may also have to choose between single-flue or multi-flue caps when you install a chimney cap, depending on how many flues your chimney has. Single-flue caps are made for chimneys with only one flue. Multi-flue caps, on the other hand, cover more than one flue at a time, which makes them better for bigger chimney systems. Choosing the appropriate kind of cap is an important part of putting on a chimney cap since it makes sure that it works well and lasts a long time.
Getting Ready to Put on the Chimney Cap
Before putting in the chimney cap, you need to do a lot of planning to make sure it fits well and stays in place. Check the chimney for any damage, such as fractures in the masonry or rust on metal parts, before you start. Fixing these faults before installation is important to avoid problems in the future. After that, measure the chimney flue’s size so you can pick a cap that fits well. It’s very important to take accurate measurements when chimney cap installation. If the cover doesn’t fit properly, water or animals could get in, or it could fall free in severe winds. Also, get all the tools you’ll need, such a drill, screws, caulk, and gloves to protect your hands. It’s also important to clean the top of the chimney and the flue before putting it up. Cleaning the chimney cap of soot, dirt, and bird nests will make sure that it is securely installed and that the chimney works well. Preparation is an important part of putting on a chimney cap since it keeps problems from happening later and makes the cap work better overall.
How to Put a Chimney Cap on Step by Step
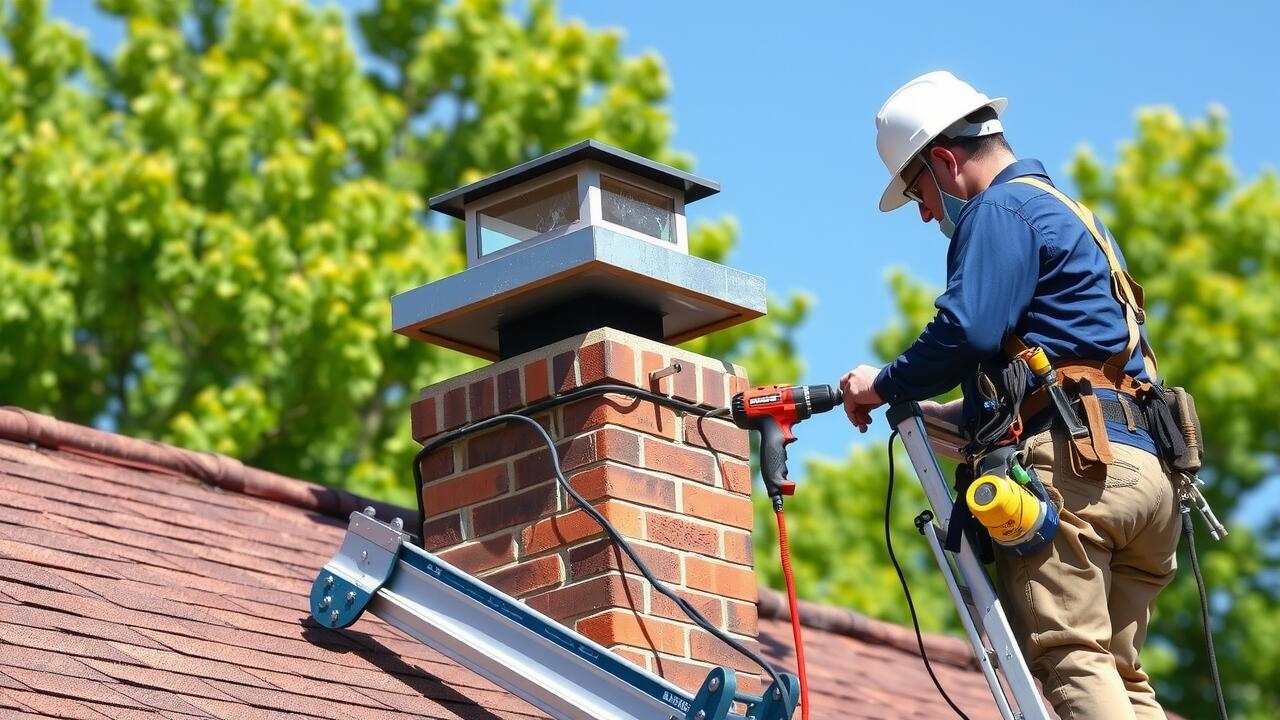
Installing a chimney top safely and effectively requires paying close attention to detail and doing it right. Start by putting the chimney cap on top of the flue and making sure it covers the aperture completely. After you put the cap in place, use a drill and the right screws to make sure it is properly attached to the chimney. Make sure that all of the screws are snug and that the cap doesn’t move or wobble. In some circumstances, putting high-temperature caulk around the edges of the chimney flue before putting on the cap might help keep water from getting in even more. Checking that the mesh screen on the chimney cap is in good shape and has no gaps is also part of installing the cover correctly. This keeps tiny animals and trash from getting into the chimney. Check the cap from different angles once it has been put on to make sure it is securely fastened and in the right place. Following these procedures will make sure that the chimney cap installation does what it is supposed to do: protect, work well, and keep people safe.
Advantages of Putting in a Chimney Cap
Chimney cap installation does more than just protect your chimney from the weather and wildlife. Better energy efficiency is one of the best things about it. A chimney cap that is built correctly helps control the flow of air, which keeps the house cooler in the summer and keeps heat from escaping in the winter. This can make your home more pleasant and cut your energy expenditures. Putting a chimney cap on is also a great way to stop fires. The cap stops sparks from getting out and starting fires in neighboring flammable items. Also, putting on a chimney cap means you won’t have to clean your chimney as often because the cap keeps things like leaves, twigs, and nests from building up inside the flue. Not only does this save time and money, but it also lowers the chance of chimney obstructions, which can cause harmful smoke or carbon monoxide accumulation. In short, putting in a chimney cap is a way to make your home safer, use less energy, and lower the expense of upkeep.
Common Errors When Installing a Chimney Cap
Even though it has its benefits, putting a chimney cap on the wrong way can cause a lot of problems. One mistake that happens a lot is choosing a cap that is too big or too tiny for the chimney flue. A cap that doesn’t fit well can let in more air and come off in heavy winds. Another common mistake is not using screws or brackets to hold the cap in place properly. This might cause it to come free or fall off over time. Some homeowners don’t check the top of the chimney before putting on the cap, which might lead to putting it on a damaged surface. Also, employing the improper kind of cap material for the weather can make it less durable. For example, galvanized steel may rust quickly in places with a lot of humidity or near the ocean. If you don’t make these blunders when chimney cap installation, it will work well and survive for many years.
After Putting in the Chimney Cap, you Need to Take Care of It
Installing a chimney cap isn’t a one-time job; you need to do regular maintenance to keep it safe. Check the chimney cap for damage, rust, or loose screws at least once a year. It’s also important to clean the mesh screen to get rid of soot and other debris, since blockages can slow down airflow and make the system less efficient. It is a good idea to inspect the cap every season, especially after a lot of rain or snow, to make sure it stays in place. If any damage is found, it needs to be fixed or replaced right away to keep water from getting in or animals from getting in. Chimney cap installation includes maintenance, because even a well-installed cap can break down over time if it isn’t cared for properly. Regular care will keep the benefits of chimney cap installation, such safety, energy efficiency, and less maintenance, for many years.
Choosing a Professional to Install a Chimney Cap
Some homeowners may choose to install their own chimney cap, but hiring a professional can provide them more peace of mind about safety and quality. Certified chimney experts have the knowledge and skills to make sure that measurements are exact, that the chimney is securely attached, and that it meets local building requirements. When a professional installs a chimney cap, they also check the chimney for hidden problems that could make the top less efficient. Also, professionals can suggest the best type of cap based on the chimney’s shape, the weather, and how it will be used. Hiring a professional to put in your chimney cap lowers the chance of mistakes, makes your home safer, and protects it for a long time.
When You Need to Install a Chimney Cap
There are many signs that a chimney cap needs to be put on or is long overdue. If precipitation or moisture builds up in your chimney often, this is a strong sign that you need a cap. If animals are active around the chimney, such birds building nests nearby or squirrels trying to get in, it is another sign that a chimney cap may be helpful. If there is too much garbage, leaves, or twigs in the chimney, it may be time to put up a protective barrier. Also, for safety, it’s important to put a cap with a mesh screen on the chimney if sparks or embers are coming out of it during fires. If you notice these indicators and take care of them right away by putting in a chimney cover, you can avoid bigger problems like water damage, fire hazards, or the structure falling apart.
Things to Think about While Installing a Chimney Cap
The price of putting on a chimney cap depends on the size, shape, and material of the chimney. Copper caps are usually more expensive, but they look nice and last a long time. Stainless steel caps are less expensive and last a long time. The cheapest choice is galvanized steel caps, although they could need to be replaced sooner. The cost of labor also depends on how hard it is to build, how tall the chimney is, and how much the professionals charge. Even if doing the work yourself may save you money on labor, you should think about the hazards and long-term rewards. You may save money over time by buying high-quality materials and hiring a professional to install your chimney cap. This will stop damage, lower maintenance costs, and make your home safer.
Installing a Chimney Cap can Make Your Home Safer
The main goal of putting up a chimney cap is to protect your home and family. A properly constructed cap keeps rain, snow, and debris out of the chimney, which lowers the chance of mold growth and water damage. It keeps animals out, which cuts down on obstructions and the risk of fire or smoke inhalation. Chimney caps help keep homes safe from fire by stopping sparks from escaping. This is especially important in homes with wooden buildings or flammable materials nearby. It also makes your heating system work better, which saves you money and makes the inside of your home more comfortable. chimney cap installation is a proactive step that protects both your health and your property, therefore it’s an important part of responsible home care for homeowners.
In conclusion
Installing a chimney cap is an important element of taking care of your chimney. It has several benefits, including safety, fire prevention, energy efficiency, and protection of the structure. Choosing the right type of cap, getting the chimney ready, and putting it on carefully can keep water, debris, and animals out for a long time. Regular maintenance and professional inspections make chimney cap installation more effective, and avoiding common mistakes saves money on repairs. Every homeowner should know how important it is to chimney cap installation and take efforts to do so. This will keep their home secure, efficient, and give them peace of mind. Your chimney will work securely and well for years to come if you install it correctly, keep it up to date, and make upgrades when they are needed. Putting on a chimney cap is not just a small thing; it’s a very vital part of keeping one of the most important systems in your home safe.
Read More:- Best LVP Flooring Guide for Durable Stylish Modern Homes Today


